

A day hike solar charging plan works best when it is built around real outdoor conditions rather than ideal laboratory numbers. A portable solar panel can help extend the usable battery life of a phone, power bank, GPS device or other compatible electronics, but sunlight is constantly changing outdoors.
A 36W portable solar panel rating does not mean a connected device will receive 36W continuously throughout the day. Actual solar charging performance can change with sun angle, cloud cover, partial shade, temperature, panel orientation, cable condition and the charging behavior of the connected device.
For a typical day hike, the most practical strategy is simple: start with your devices charged, carry backup power, and use longer stationary breaks as opportunities to collect additional solar energy.

Use stationary breaks to give a fully opened four-panel solar charger clear, unobstructed sunlight.
Why solar charging makes sense on a day hike
Phones now handle much more than calls and messages during outdoor trips. Many hikers use their phones for GPS navigation, offline maps, photography, video, weather information and emergency communication.
All of these activities consume battery power.
A day hike may only last several hours, but battery use can increase quickly when you:
-
Keep GPS tracking active.
-
Take frequent photos and videos.
-
Use maximum screen brightness outdoors.
-
Navigate with mapping applications.
-
Use mobile data in areas with weak reception.
-
Connect Bluetooth headphones or a smartwatch.
-
Use your phone as a camera for most of the trip.
Carrying a compact foldable solar panel gives you another way to add energy when conditions are suitable.
However, it is better to think of solar as supplemental outdoor charging rather than guaranteed replacement power.
That distinction makes a day hike charging plan much more realistic.
Plan around hiking breaks, not fixed charging times
One of the biggest mistakes when planning portable solar charging is trying to calculate an exact number of minutes required to charge a phone.
Outdoor sunlight is too variable for that.
A lunch stop, viewpoint break or extended rest period usually gives you much better control than trying to collect solar energy while continuously walking.
During a stationary break:
-
Find an open area with direct sunlight.
-
Fully unfold all four sections of the solar panel.
-
Position the panel toward the strongest available sunlight.
-
Connect a compatible phone or power bank.
-
Keep the connected electronics away from excessive heat.
-
Recheck the setup if sunlight or shade moves.
This approach allows the panel to remain in a relatively stable position.
By comparison, a panel attached to a moving backpack constantly changes angle as you walk. Trees, your body, surrounding terrain and the backpack itself may repeatedly block sections of the panel.
For this reason, stationary charging is generally more predictable than charging while hiking.
Fully open the solar panel
A foldable solar charger is designed to create a larger light-gathering surface when opened.
For the iFORWAY 36W portable solar panel, unfold all four sections during charging whenever space and conditions allow.
Do not leave sections folded behind each other if you are trying to collect as much available sunlight as possible.
A useful setup area might include:
-
A flat rock.
-
An open picnic table.
-
Dry ground beside a trail.
-
A sunny section of grass.
-
A campsite table.
-
A clear area near a viewpoint.
The goal is not simply to put the panel outside. The goal is to give as much of its active surface as possible access to direct sunlight.
Watch for partial shade
Partial shade matters more than many first-time solar users expect.
A panel can look as though it is sitting in sunlight while one section is actually covered by:
-
A tree branch.
-
Your backpack.
-
A water bottle.
-
Hiking equipment.
-
Your own shadow.
-
A nearby rock or structure.
As the sun moves, a setup that worked well at the beginning of your break may become partially shaded later.
During a longer lunch stop, take a quick look at the panel every so often.
If shade begins moving across it, reposition the panel.
This small adjustment can make a solar charging setup much more consistent.
Adjust the panel as sunlight changes
There is no single perfect outdoor angle that works throughout an entire hike.
Sun position changes during the day, and every trail is different.
Instead of worrying about a precise angle, start with a practical rule:
Point the panel toward clear, direct sunlight and avoid unnecessary shade.
If the sunlight is coming from one side, slightly changing the orientation of the panel may expose it more effectively.
You do not need to constantly adjust it every few minutes. But during a longer stationary break, checking the panel once or twice can be worthwhile.
Keep the panel in sunlight and your devices in shade
The solar panel needs sunlight.
Your phone and power bank do not.
This is one of the most important habits for outdoor solar charging.
A phone placed directly on top of a solar panel may become unnecessarily hot. Strong sunlight, warm ambient temperatures and charging can all contribute to device temperature.
Instead, separate the two parts of the setup.
Place the solar panel in direct sunlight, then route the USB-C cable toward a cooler location where the connected phone or power bank can remain ventilated and protected from direct sun.

Separate the light-gathering panel from connected electronics: panel in direct sun, devices in ventilated shade.
For example, a connected device might sit:
-
Under the edge of a backpack.
-
Beneath a picnic table.
-
In an open backpack compartment with airflow.
-
Behind a rock that blocks direct sunlight.
-
Under another piece of hiking equipment without trapping heat.
Do not completely wrap or cover a charging device in a way that prevents heat from escaping.
Direct phone charging vs. charging a power bank
There are two common ways to use a portable solar panel during a day hike.
Option 1: Charge your phone directly
Direct solar-to-phone charging can be useful when:
-
Your phone battery is already low.
-
Sunlight is reasonably stable.
-
You are stopping for a longer break.
-
Your phone supports the available connection.
-
You can keep the phone cool while charging.
The advantage is simplicity. The panel provides available power directly to the phone.
The disadvantage is that changing sunlight may cause charging behavior to fluctuate.
Option 2: Charge a compatible power bank
A power bank can act as an energy buffer between the solar panel and your other devices.
During a sunny break, you can collect available solar energy in the power bank. Later, you can use stored power to charge your phone when walking, sitting in shade, riding back home or traveling after the hike.
This can be particularly useful if you already carry a power bank as part of your normal hiking kit.
It also gives you more flexibility because the phone does not have to remain connected to the solar panel during every charging opportunity.
Start the hike with charged devices
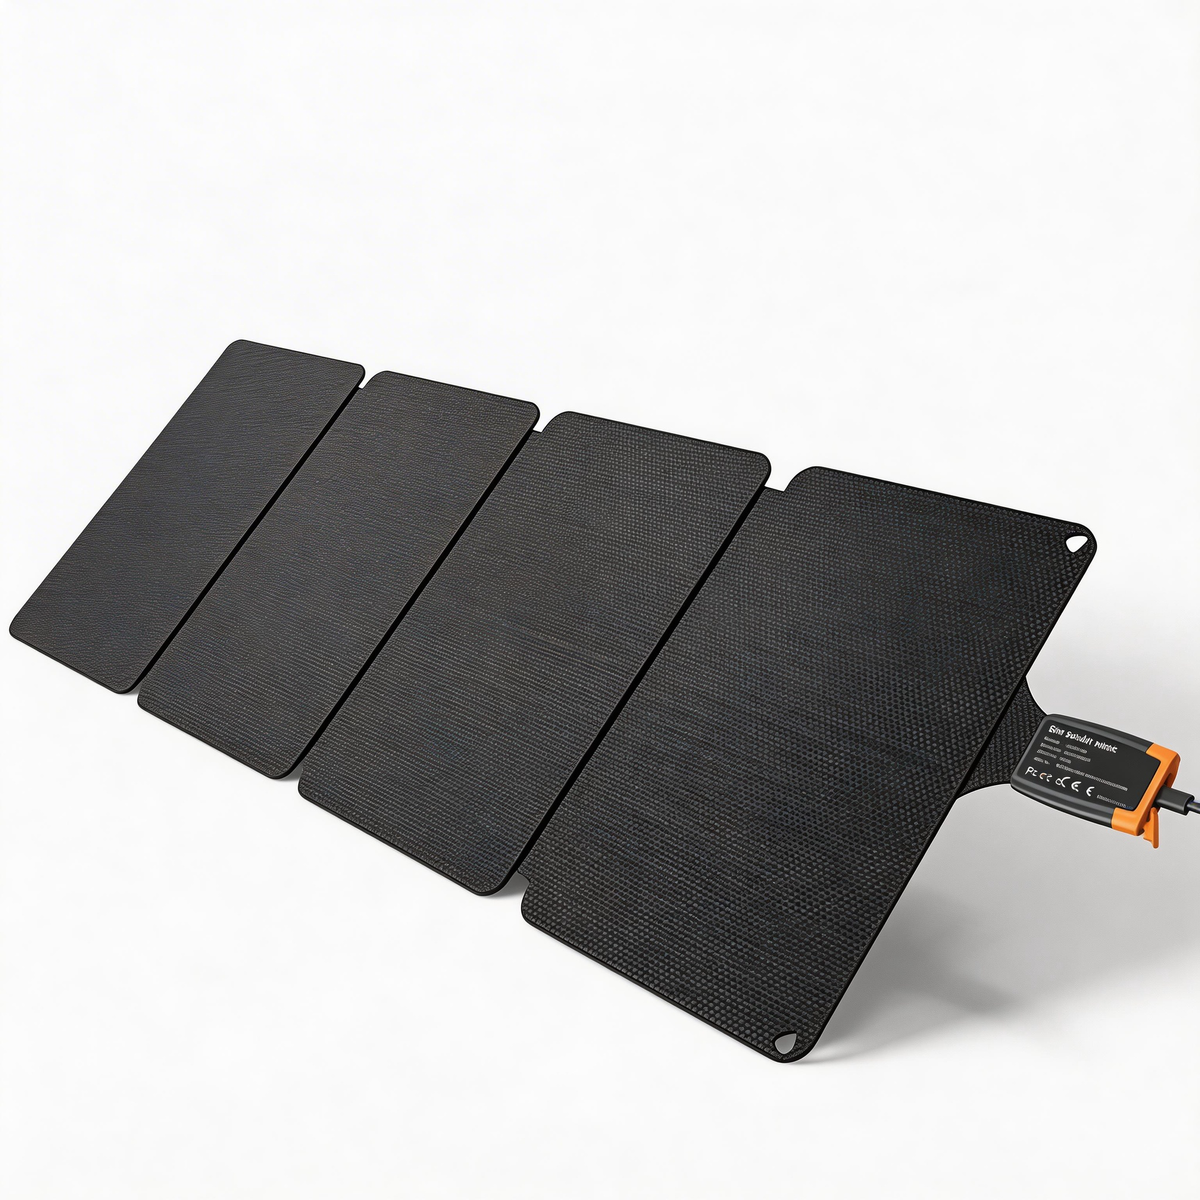
iFORWAY 36W Backpacking Solar Charger
At only 2.35 lb, this foldable USB-C solar charger is built to keep phones, power banks and everyday essentials powered when you're away from an outlet.
A portable solar panel should not replace basic trip preparation.
Before leaving home, charge:
-
Your phone.
-
Your power bank.
-
Your smartwatch or GPS device.
-
Any rechargeable lights.
-
Any other electronics you consider important.
Solar energy collected during the hike should ideally extend your existing power reserve rather than rescue a completely empty battery.
That is especially important for devices used for navigation or emergency communication.
If the weather changes or your route becomes heavily shaded, solar generation may become limited.
Starting with fully charged equipment gives you a much larger safety margin.
Build solar charging into your hiking schedule
Instead of stopping specifically to charge, combine solar charging with breaks you were already planning to take.
Morning trail break
If sunlight is already strong and you stop for water or a snack, opening the panel can provide an early charging opportunity.
Lunch break
A longer lunch stop is often one of the best opportunities to use a foldable solar panel.
You are stationary, you may have 20–60 minutes available, and you can position the panel without carrying it.
Scenic viewpoint
If you stop at an open viewpoint to take photos or rest, check whether there is clear sunlight.
Open terrain may provide better solar exposure than a forested part of the trail.
Afternoon rest
Battery usage may become more noticeable later in the day after hours of navigation, photography and screen time.
An afternoon charging session can help restore some energy before the return part of the hike.
The main idea is to integrate solar charging into natural breaks instead of reorganizing your entire hike around the panel.
Forest trails require different expectations
Solar charging is much easier in open terrain than under dense tree cover.
On a forest trail, sunlight may repeatedly pass through branches and leaves, creating rapidly changing patches of light and shade.
Even if the weather is clear, the panel may not receive steady direct sunlight.
In these conditions, wait until you reach:
-
A clearing.
-
An open viewpoint.
-
A trailhead.
-
A picnic area.
-
A lake shore.
-
An exposed section of terrain.
Trying to constantly reposition the panel under dense forest cover may not be worth the effort.
Your backup battery becomes more important on shaded routes.
What about cloudy weather?
Portable solar panels can still encounter light during cloudy conditions, but available energy may be substantially lower than under strong direct sunlight.
Cloud thickness can also change quickly.
You should therefore avoid planning a hiking trip around the assumption that solar charging will always be available.
Before leaving, check the weather forecast and consider your route.
If the forecast shows:
-
Heavy cloud.
-
Rain.
-
Storms.
-
Dense fog.
-
Long periods under forest cover.
Treat solar as an optional bonus rather than a primary charging source.
Can you attach the panel to a backpack?
A foldable solar panel may sometimes be positioned on or attached to a backpack depending on the product design and hiking setup.
However, backpack charging should not automatically be expected to match a stationary setup.
While you are walking:
-
Your body constantly changes direction.
-
The panel angle changes.
-
Trees create moving shade.
-
Straps or equipment may cover part of the panel.
-
The backpack may tilt forward or backward.
-
Cable movement may put stress on connectors.
Backpack mounting can still be useful when conditions are favorable, but it should be viewed as opportunistic charging.
If you reach a good break location, opening the panel fully in stable direct sunlight is generally the more controlled option.
Protect cables and connectors
A good solar charging setup is not only about sunlight.
Cable management matters too.
When setting up the panel:
-
Avoid pulling the cable tightly.
-
Keep the connector free from unnecessary sideways tension.
-
Do not run the cable across a busy walking path.
-
Keep connectors away from dirt and loose debris.
-
Avoid sharp bends near the USB-C connector.
-
Make sure the device cannot easily be pulled off a table or rock.
A slightly longer cable route may sometimes be useful because it allows the panel to remain in sunlight while the phone or power bank stays in shade.
The connection should still remain neat and secure.
Protect the charging setup from sudden weather changes
Outdoor conditions can change quickly.
Even if a portable solar panel is designed for outdoor use, connected electronics and exposed charging connections should still be handled carefully.
If weather conditions deteriorate, disconnect and pack your electronics rather than leaving the entire charging setup exposed.
Never assume that a phone, power bank or exposed USB connection has the same environmental protection as the solar panel itself.
A practical day hike charging example
Consider a typical six-hour day hike.
You start the trip with:
-
A fully charged phone.
-
A charged power bank.
-
A folded portable solar panel.
During the first two hours, the phone is used for navigation and photography.
At the first major viewpoint, you stop for approximately 20 minutes. The area has clear sunlight, so you open all four sections of the solar panel and connect your power bank.
You continue hiking.
At lunch, you find another open area with direct sunlight. Instead of leaving your phone exposed on the panel, you position the panel in the sun and place your connected device in ventilated shade.
Later in the afternoon, the trail enters dense tree cover and solar conditions become poor.
You pack the panel away and rely on the energy already stored in your phone and power bank.
This is a much more realistic solar charging strategy than expecting the panel to continuously power everything throughout the hike.
When a foldable solar panel is most useful
A portable solar panel becomes especially practical when your day includes:
-
Long lunch stops.
-
Open viewpoints.
-
Sunny campsites.
-
Picnic areas.
-
Lake or beach sections.
-
Desert or open mountain terrain.
-
Photography sessions where you stay in one location.
-
Long outdoor days away from wall outlets.
The more stationary time you have in clear sunlight, the easier it is to take advantage of solar charging.
When solar should remain a secondary option
There are also situations where relying heavily on solar is less practical.
Examples include:
-
Dense forest hiking.
-
Short winter daylight hours.
-
Heavy cloud cover.
-
Rainy weather.
-
Fast-paced hikes with few breaks.
-
Routes mostly inside valleys or shaded terrain.
-
Situations where emergency communication depends on a single device.
In these cases, carry enough stored battery capacity for the trip independently of expected solar output.
About the iFORWAY 36W Portable Solar Panel Charger
The iFORWAY 36W Portable Solar Panel Charger uses a compact four-section foldable design intended for portable outdoor charging.
Its foldable format makes it easier to pack for activities such as:
-
Day hikes.
-
Picnics.
-
Outdoor photography.
-
Road trips.
-
Camping.
-
Travel.
-
Emergency backup preparation.
When you stop, open all four sections and place the panel in the clearest available sunlight.
Always use the product documentation to confirm supported connections, operating guidance and care requirements.
Actual output will depend on environmental conditions, so avoid treating the panel's rated wattage as a guaranteed continuous output to a connected device.
Do not rely on fixed outdoor charging-time claims
Questions such as “How long will a 36W solar panel take to charge my phone?” sound simple, but there is no universally accurate answer.
Two hikers using the same solar panel could experience different charging performance because of differences in:
-
Geographic location.
-
Season.
-
Time of day.
-
Weather.
-
Panel angle.
-
Temperature.
-
Shade.
-
Phone model.
-
Battery percentage.
-
Cable.
-
Device charging limits.
A reliable charging-time claim would require controlled testing with clearly stated conditions.
For real hiking use, it is more useful to focus on good setup habits and available charging opportunities.
Day hike solar charging checklist
Before leaving:
-
Fully charge your phone.
-
Fully charge your backup power bank.
-
Confirm that your USB-C cable works.
-
Check the weather forecast.
-
Pack the solar panel where it is easy to access.
During a break:
-
Fully open all four sections.
-
Find unobstructed direct sunlight.
-
Keep bags and equipment from shading the panel.
-
Connect only compatible devices.
-
Keep the phone or power bank in ventilated shade.
-
Avoid tight cable bends or connector tension.
-
Reposition the panel if nearby shade moves.
Before continuing the hike:
-
Disconnect the device carefully.
-
Check that cables and connectors are dry and clean.
-
Fold and secure the solar panel.
-
Confirm that your phone and backup power are safely packed.
FAQ
Is a 36W solar panel useful for a day hike?
It can be useful when the hike includes good sunlight and stationary breaks. It is best treated as an additional source of energy rather than your only source of power.
Will backpack mounting match stationary solar output?
Not necessarily.
While walking, the panel continuously changes direction and may pass through shade. A fully opened panel positioned in stable direct sunlight during a break generally provides more controlled conditions.
Should I charge my phone directly from the solar panel?
You can use a compatible connection when supported by the device and product documentation.
Keep the phone ventilated and away from unnecessary direct heat while charging.
Is it better to charge a phone or power bank?
That depends on your situation.
Direct phone charging can be convenient during a stable sunny break. A compatible power bank can also serve as a useful buffer by storing available solar energy for use later.
Can I leave my phone on top of the solar panel?
It is better to separate them.
Place the solar panel where it receives sunlight and keep the connected phone or power bank in a cooler, ventilated location whenever possible.
Does a 36W rating mean my phone receives 36W?
No.
Rated solar-panel power and the actual power received by a connected device are not the same thing.
Sunlight strength, shade, temperature, conversion losses, cables and device charging limits all influence real-world performance.
Does the panel work in cloudy weather?
Available solar energy usually decreases when sunlight becomes weaker or more diffuse.
Cloud conditions vary widely, so do not depend on a fixed amount of energy during cloudy weather.
Do I still need a power bank if I carry a solar panel?
For most day hikes, carrying charged backup power is still a good idea.
Solar availability depends on environmental conditions that you cannot fully control.
What is the best time to use a solar panel while hiking?
Use it whenever your route gives you a combination of direct sunlight and enough stationary time to set the panel up properly.
Lunch breaks, open viewpoints and longer rest stops are often more practical than trying to charge continuously while walking.
Final takeaway
A successful day hike solar charging plan does not depend on chasing maximum wattage every minute.
Start with charged devices. Carry backup power. Use a compatible cable. When the trail gives you a sunny stationary break, fully open the solar panel, keep its surface clear of shade and place connected electronics somewhere cooler and ventilated.
Think of portable solar as a way to extend your available energy during the day, not as a guarantee that every device will remain fully charged regardless of weather or terrain.
That approach makes a foldable solar panel much easier to use realistically on hiking trails, at viewpoints, during lunch breaks and throughout other outdoor activities.
0 comments